Busy, busy, busy!

Oh my.  This has been a very busy time for me.  I write while the kiln is cooling.  The last load of pottery that I can have ready for Friday is in there now.  I don’t believe I made my 10 plate quota, but I do have a grace period.  The Ottawa Food Bank’s Appreciation Lunch is scheduled for April 28, so it isn’t imperative that I have all 10 plates delivered on Friday the 15th.  In a perfect world, two plates wouldn’t have cracked.  In a perfect world my kiln would have been larger so I could fire more than 4 plates at a time. In a perfect world the tendinitis in my right shoulder would not exist.

Finished Ottawa Food Bank Commemorative Platter

I gave it my all.  I did.  I haven’t had a proper day off since last I wrote, but I’ve given myself time for exercise, time to eat (usually in front of the computer while I work – lately the computer work has centred on getting my Etsy shop up and running), time to sleep and little tiny bits of time here and there for play.  Very little.  Too little in fact.  All work and no play makes Jack a dull boy.  Isn’t that the saying?  I’m ready to break free of the dullness of all work and no play.  It dulls the brain, I think.

Let’s talk Etsy.  Have you ever been to Etsy.com?  It’s the Mecca of hand made everything!  And my shop now has 5 listings.  W00t!  Ha ha!  It will grow in time, I’m actually waiting for photos to upload to my Etsy shop while I write this blog.  6 listings now! Yay!

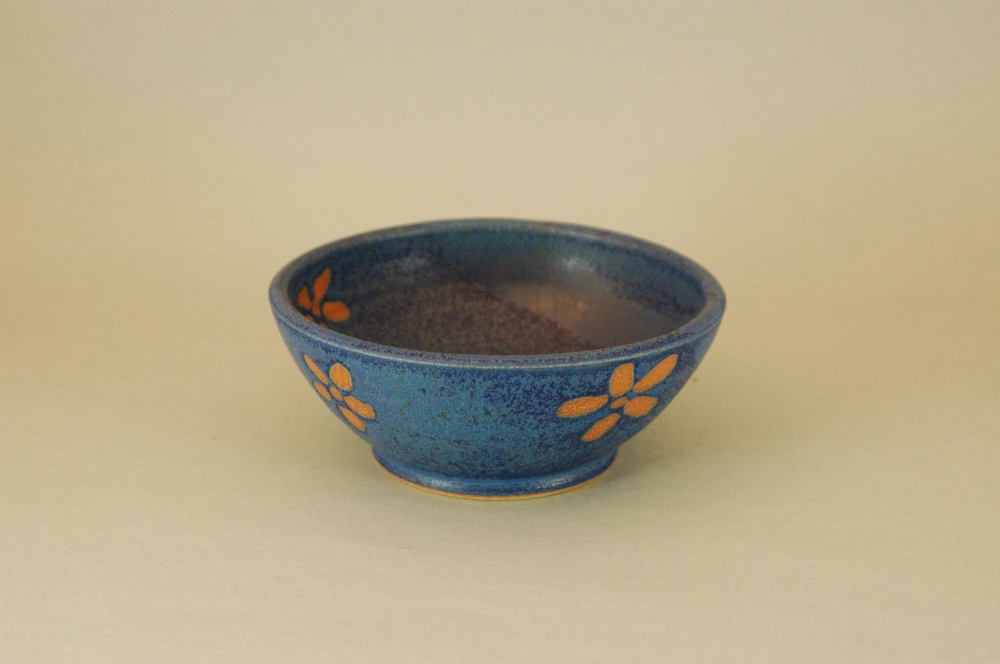
Here’s a picture of one of the pieces up for sale.

Small "Daisyware" bowl

Getting great photos with good depth of field isn’t an easy feat, nor is finding time to take pictures.  It requires a day or two in the pottery studio (the only place where I have room to do it) with special lights and a tent in which to take photos, special background paper, the “good” camera and my trusty tripod.

I decided to create an Etsy shop so I have a presence online all of the time as well as being “the” local potter.  I mean, if YOU aren’t local but want to buy my pots, what better way than doing it online?

Time to unload the kiln and see what the Fire Gods have given me.

Oh yeah, here’s my Etsy shop link:  http://www.etsy.com/shop/SerafinStoneware

Posted in my work | Leave a comment

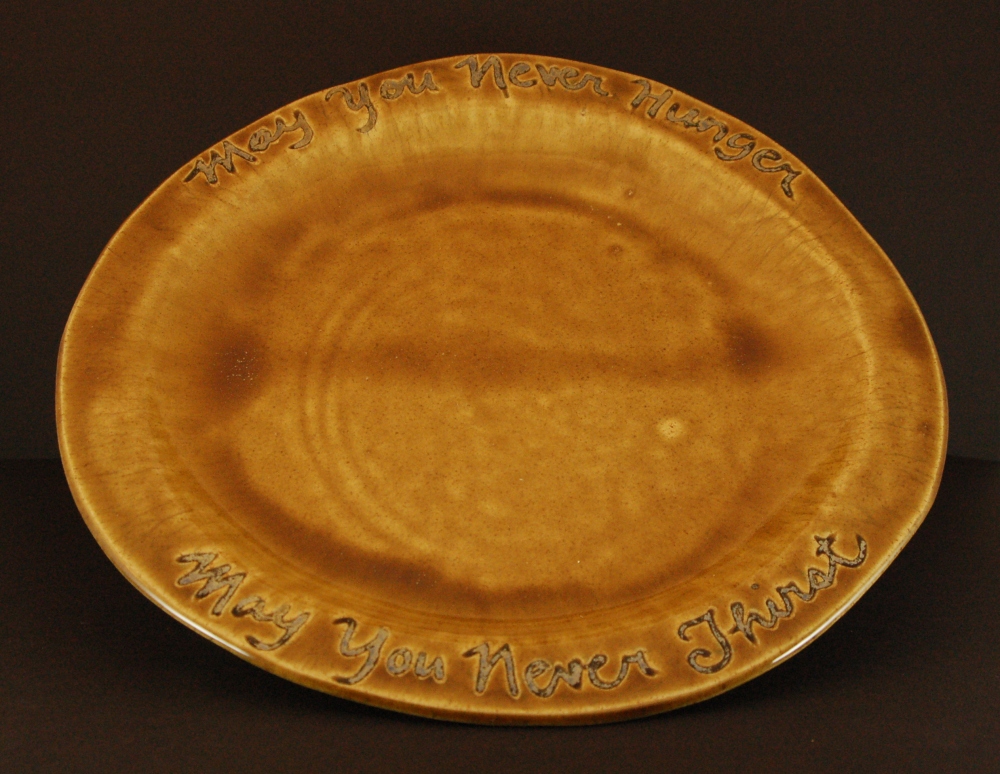
“May You Never Hunger. May You Never Thirst.”

I’ve been working hard these past few weeks against a deadline. In mid-April I’ve promised to deliver 10 commemorative plates to the Ottawa Food Bank for their awards Luncheon. The plates are being given to do-gooders in the community who help the Food Bank in many ways. I feel extremely honoured to be doing this job.

I got involved with the Food Bank when I started working with the organization in 2005. There is an event that the Ottawa Guild of Potters puts on each year to raise money for the Ottawa Food Bank called Great Bowls of Fire. It was something that I’d started with the Guild in 2005 and I must say that I’m very proud to have done so.  It’s meant a lot to the potters, the city and to the Food Bank.

Great Bowls of Fire was inspired by a program started in the U.S. called Empty Bowls. A potter from Perth by the name of Jackie Seaton also started an Empty Bowls project years ago and I was inspired by the idea so much so that I resigned from my vice presidency with the guild in order to devote all of my energies to getting Great Bowls of Fire off the ground.

The flagship event is always the most difficult one.  You just never know what can happen, what you’ll need, how many hours you have to put into it. Well I discovered soon enough and I worked many long hours on making that event a success, as did a handful of other potters from the guild in addition to the many talented craftspeople who donated bowls, the 10 restaurants that came with delicious soups (donated) and the dozens of other businesses who donated bread and beverages and the musicians who donated their time and talent to make the event a huge success.  Imagine that!  We sold out our first year.  I was so surprised to see the line up of people in The Glebe Community Centre.  I really didn’t know what would happen, but something great happened that night and continues every year!

The name Great Bowls of Fire came from one of our past presidents – Chandler Swain.  I thought it was such a great name to call our event.  I googled it and found only references to chili cook-offs in the southern U.S., so we just went with it!

Since then the event has run with a rotating list of potters’ guild volunteers who step up to the plate each year to lend a hand.  We have raised in total, since the beginning, probably close to (if not more than) $75,000 for the Ottawa Food Bank.  The Food Bank not only services Ottawa but also the Gatineau area.

That first year I was invited to the Appreciation Lunch and the guild was honoured with a plaque and as Peter Tilly, the director of the Food Bank, took the stage to announce the donations that came in that year, he said that because of the potters guild and the $10,000 we’d raised we had, in effect, paid off the insurance on all of their vehicles.  What a rewarding experience!

Many years ago I met a woman who told me an old Celtic prayer:
“May You Never Hunger.  May You Never Thirst.”  I fell in love with that prayer and have carved it into many pieces of pottery since.  The first one was an oval platter that I gave to a good friend for her birthday.  Then I began carving it on the edges of bowls and about two years ago and started donating those bowls to Great Bowls of Fire.

Last year I was chosen to make and donate 30 bowls to Great Bowls of Fire and about 10 of the bowls I made had the Celtic prayer carved in to the bowl’s lip.  Honestly it’s tough carving that many words into leather hard clay.  I got a semi-permanent dent in my writing hand fingers, but it was worth it.

Imagine my surprise when I was called by our most recent past president, Colette Beardall who’d asked me to make commemorative plates for the Food Bank’s Appreciatation Lunch and that the Food Bank wanted “May You Never Hunger.  May You Never Thirst” inscribed on each plate!  Imagine the happy people who will receive a lovely hand made plate with that prayer instead of a piece of paper to hang on their wall!  I, along with 3 other potters received the honour of making those 40 plates.

I was very pleased indeed!  I started making my plates as soon as I could and now the first 4 are cooling in bisque kiln as I type.  I have 3 or 4 more drying and today I will put another two into my plate molds and keep on making them 2 by 2 until I have 12.  I want 12 just in case, ya know?  Kevin always said, “If you’re making a 4 piece dinnerware set, make it at least 6 because you just never know what’ll happen.  And he was right! Something comes up.  It could be a crack, the plate could end up  being warped, there could be a problem with the glaze, etc., etc.

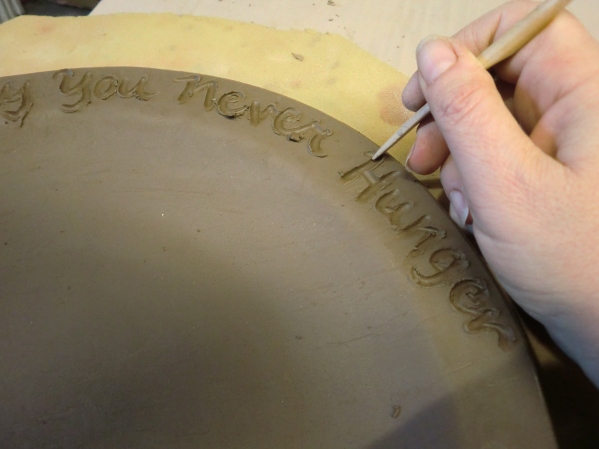
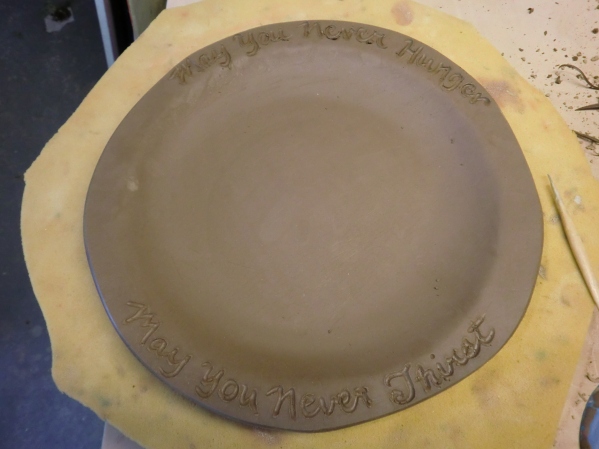
Here’s a peek at the plates being carved.

Cleaning up the lettering

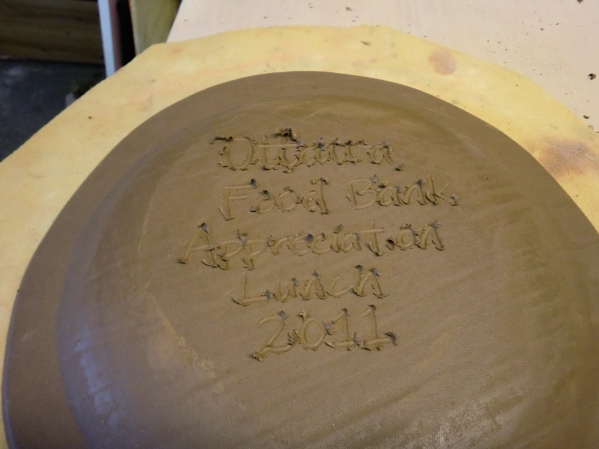
Ottawa Food Bank Appreciation Lunch 2011

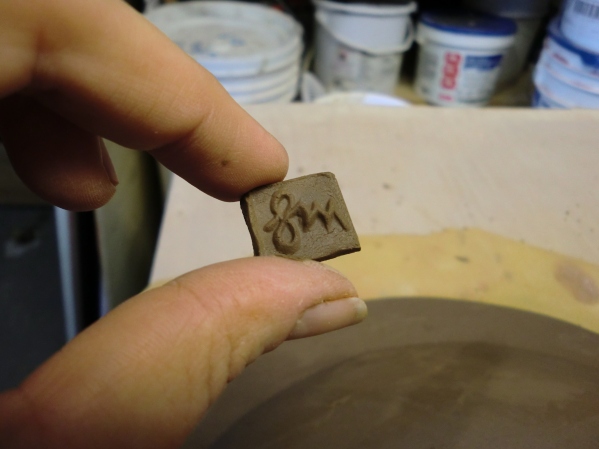
Adding my special touch – my initials; “LM” to the back of the plate.

My stamp or "maker's mark."

The finished plate – leather hard clay.

This will get glazed - blue lettering, white background.

If you’ve read previous blogs, you know this plate is a style I call “Caveware.”  This is a 12″ plate that is meant to look uneven on the edges.  I roll out the clay with my huge rolling pin and then place it in a mold I made from discarded acoustic ceiling tile.  I trace an uneven edge then hand cut each plate with my fettling knife.  After it is set up enough to retain it’s shape when moved, I remove it from the mold, bevel the edges and smooth out the bottom then get to carving the lettering.

Although the plates ordered by the Food Bank do not need to be functional, mine are and are meant to be used.  Alternately they can be hung up on the wall with the aid of a plate hanger.

I intend to make a lot  more of these large plates, which would be nice as a serving platter since they are 12″ and of course more bowls with the same prayer carved into the lip. First things first though.  Commission for the Food Bank, orders from my customers that are still pending (and of course in progress!), and then the guild spring sale from April 28 – May 1 at which you will likely find said platters and bowls sans the tribute on the back.

Hey, did you know that the Ottawa Guild of Potters Spring Sale and Exhibition will be at the Shenkman Arts Centre in Orleans this year?

Posted in my work | 9 Comments

Girls’ Night Out – The Event

Yes!  There will be a bar.  Yes!  There will be food.  Yes!  There will be live music – the lilting harp duo Acacia Lyra.  Yes!  I will be there with lovely pottery.  Yes!  There will be oodles of girly stuff there including health and fitness expert Guylaine Perreault, designer fashions, CHOCOLATE, tea and more!  I hope you can make it out.  😀

P.S.  Check us out on Facebook
http://www.facebook.com/event.php?eid=130079483727650

Here is a list of the lovely women who will be presenting their wares and services:

Joan McNeill – Tanglewire Jewelry
Jean Brown- Clothing Designer
Acacia Lyra – two harps, two voices.
Liz Stewart – Make-up artist
Jennifer Shaver – Pampered Chef
Kymberly Brown – Skin Care Expert
Karen Donaldson – Gold Canyon Candles
Francoise Forget – Chapelier/Hat Maker
Shirley Fulton Deugo – Fulton Farm
Debbie Lorint – Cafe Viva Loca (located in the GCTC building)
Tracey Berrigan – Certified Wedding Planner of Wedrose
Lorraine Cormier – Bio Sculpture Canada
Lisa-Marie Serafin – Artist and Potter of Poterie du Lac la Blanche
Guylaine Perreault – Occupational Therapist/Health and Wellness Specialist
Jennifer Winter- Koko Chocolates
Carolyn Mehdi – Accessories and home decor from around the globe

Posted in fun stuff | Leave a comment

Sweet Treasures

Yesterday while out and about I passed two thrift stores and my “spidey senses” started tingling.  While living in Winnipeg and working at The Blue Door Clay Studio I used to frequent the Salvation Army Thrift Store daily because it was in the same complex as the clay studio.  And what treasures I’ve found!!  Everything from silver earrings with lapis lazuli to a red bell bottom trousers to a Beledi dress covered in sequins and beads.

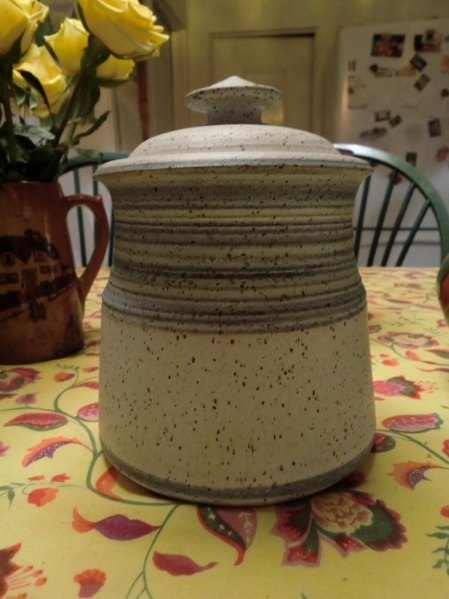
I hadn’t been thrift store hopping in a very long time and yesterday I was feeling the “sweet treasure” vibe, so I popped into the Sally Ann.  My treasure was not within so I worked my way down the street to Value Village and there it was!  This beautiful stoneware jar for $7.99 ($9.03 with tax)!!

The stoneware jar - Speckled clay, probably coloured slip under white glaze. Beautifully made with a great fitting lid.

The Maker's Mark

I’m not sure if that says “Carpenter” or not, but that is the signature on the bottom of the jar.

If you love pottery and think you can’t afford it you too might just want to start scouring the thrift shops for your own sweet treasures.  You won’t get all matching pieces, but over the years you might end up with a nice little collection of perfectly lovely pots.

Here are some other amazing things I’ve found at thrift shops and in my own backyard…so to speak.

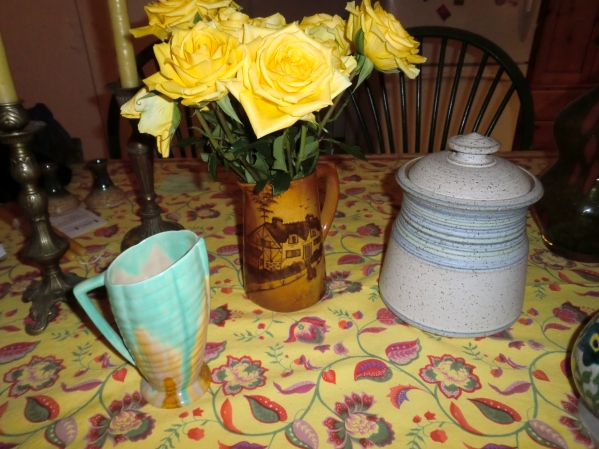
An art deco style pitcher, a pitcher containing my Valentine's Day roses that was actually my Grandmother's, and the jar I found yesterday.

The pitcher with the gorgeous yellow roses is a MedAlta pitcher.  I had a friend who used to sell antiques at flea markets tell me that this one, as it is in perfect condition, is worth some $$.  How much I don’t know, but it was Gram’s so I’m keeping it because I’m very sentimental.  It has a cottage scene painted on it and I just love it!  There is a local “Antiques Roadshow” sort of event in the summer often times so when it next comes around I’m going to take Gram’s pitcher and see what the experts say.

The art deco style pitcher is slip cast.  That means a master mold was made and then liquid clay was poured into the mold.  When the piece is dry the mold is opened, the piece is sanded, bisque fired and then glazed and glaze fired.  I love the runny, drippy glazes on it. I don’t know how old it is but it cost under $5 so it was a great find!

An earthenware Arabic jug, not in great condition, but really pretty with its cobalt blue flowers , stoneware vase, gas fired - the easiest way to get red in a copper glaze and a multi gourd shaped glass pitcher. I love glassware too!

I found the Arabic or Persian jug at a local thrift shop for a couple of bucks.  The red vase was another Value Village find for around $8 and the glass pitcher was the princely sum of $20.  They all make great flower vases and I love flowers!  When spring arrived last year and my tulips and daffodils were in bloom there was a frost warning.  It was about 4 days before Mother’s Day so I cut almost every flower in my garden and filled all of the vases in my house with the most gorgeous spring flowers.  It was heavenly!  When Mother’s Day arrived I didn’t even have to make a trip to the florist’s.

Well I’m off to work in the studio today.  I’m in an event called Girls’ Night Out on March 4 and need to get crackin’ with some new work for that show.  Details to follow in a day or so.

Posted in fun stuff | 5 Comments

This is How I Roll

Have you ever watched some one throw pots or blow glass, dance or draw? They make it look so easy, don’t they? Well, I’m here to tell you it’s not. It looks easy because dedicated artists have had so much practise at what they do when you watch them do their thing in the moment it does look easy.  Practise make perfect, right?

I like the Native Americans’ philosophy on perfection.  No human is perfect.  Only The Creator is perfect, so imperfection is worked into Native crafts purposefully.  I don’t have to work imperfection into my pots purposefully. It seems that I come by making something imperfect quite naturally.  I usually end up sticking my fingernail into a wet pot gouging out a piece of clay or dribbling wax resist where I don’t want it.  There is usually something slightly wonky about a pot.  Wabi sabi.  And that’s okay!

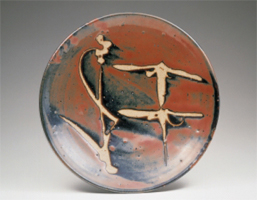
The great potter Shoji Hamada made pots that were off centre or wabi sabi and when it was pointed out he apparently stopped the wheel and asked the person who said it was crooked, “Where?”  You can’t see the so-called imperfection unless the wheel is spinning.  If you had a high speed Lazy Susan with the pot placed dead centre then maybe you might be able to detect it.  And who made this rule about hand crafted things having to be perfect anyway?

Hamada and his work.
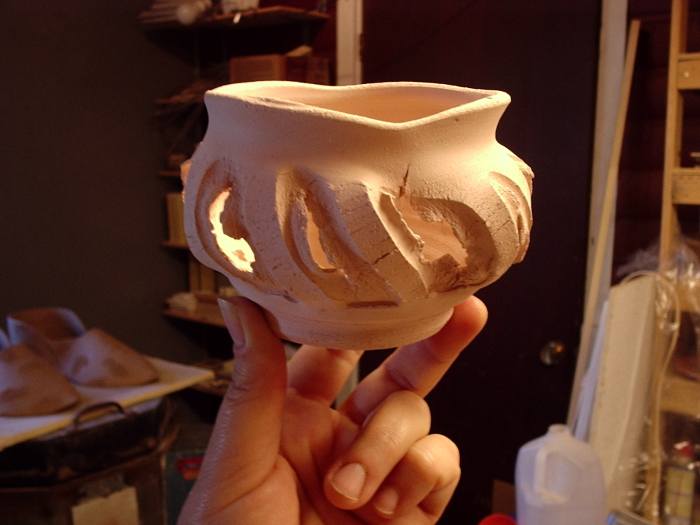
An unglazed candle lantern that I made demonstrating "wabi sabi."

The reason for this blog isn’t necessarily to point out imperfections in hand crafted pottery though.  The reason I started to write today is because I spend a great deal of time explaining to potential customers – either through email, on the phone or in person how my job is done.  If I can refer them to this blog, that means I get more time in the clay studio!

I suppose a lot of my clients have some idea about how pottery is made but they have a very tiny snapshot of all of the steps involved which, if they better understood they would know why they can’t have it exactly the way they want it.  As much as I would like to have you all ask me to make something for you, you need to know how I roll because my work just may not be what you really want.

The first step in pottery making is working with the clay.  I like to make pots on the potters’ wheel and also to hand build pottery.  What’s the difference?  Well, hand built pots can be more time consuming or less time consuming depending on the pot I choose to make.

From my very beginnings as a potter I have made dinner plates in a mold because it is less time consuming.  I can make them on the wheel too because some folks like the symmetry that wheel thrown plates provide, but because the expectation with a stack of dinner plates is that they are all the exact same size with the exact same size foot ring too, wheel thrown dinner plates are actually more expensive for me to make because they are far more time consuming considering all the measuring and fine work that goes into matching every plate. Hand built dinner plates are far less time consuming because I use a mold, therefore I can make dinner plates at a lower cost for my customers if they are hand built.

I call my dinner plates and sandwich plates CaveWare because they aren’t meant to look perfectly round.  The edges are hand cut and are purposefully uneven to give them a more artsy look. I used to call them “Flintstone” plates but I thought the Hanna/Barbera Corp. would be upset with me if I used that name.  The CaveWare plates stack very nicely because they’re the same size seeing as I made them in a mold.  My mold of choice?  Old acoustic ceiling tile material with a hole cut in it.  I get discards from the lumber store. If the ceiling tile in missing a corner or is water damaged then I get them for a reduced price and sometimes FREE!  Yay!

Now, the bottoms of the CaveWare plates are not glazed because they do not have a foot ring.  What is a foot ring anyway?  It’s that ring of unglazed clay on which the pots sits in the kiln.  If one were to put glaze on the entire bottom of any pot and fire it, it would be fused to the kiln shelf, so when one makes a piece on the wheel after it dries up for about 3-4 days (depending on the weather and/or season) it is turned upside down and a foot ring is carved out with a trimming tool.
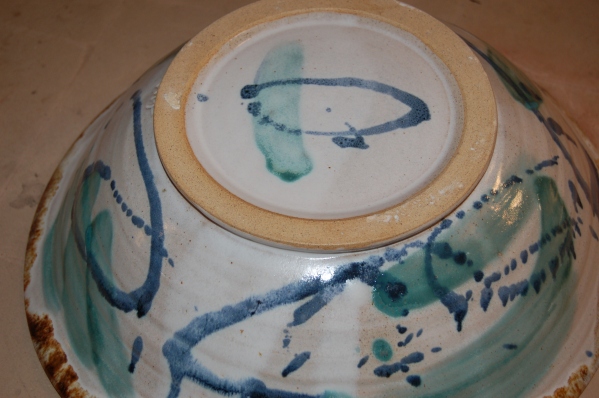
See the ring of unglazed clay? THAT is a foot ring.

The bottoms on CaveWare plates are flat and have a good deal of exposed, unglazed clay that could potentially be touching your shiny wood table and possibly scratch it.  After all it is stoneware and there is grog in the clay.  I use a rubber rib to press the grog back into the bottom of the plate, and I sand the plates after they are fired so the yfeel soft as a baby’s bottom, but they can still be a little scratchy, like micro-scratchy.  For this reason I recommend place mats or a table cloth.  I can also make plate from porcelain which has no grog in it at all.  Either way, where else can you get a beautiful hand made (hand built) dinner plate for under $30 unless it’s made by a potter?
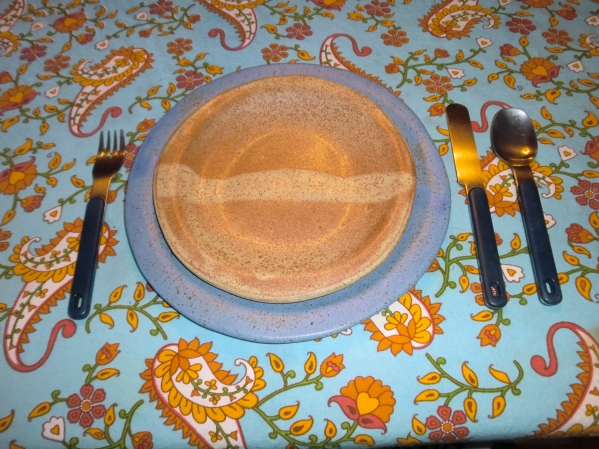
Place setting – 10” blue dinner plate (glaze – blue jeans) with sandwich plate (glaze – oatmeal) on top. From my own cupboard.

All of the dishes I’ve seen at The Super Store or Wal-Mart or Canadian Tire simply do no measure up. Those plates are made by machinery;  possibly glazed by a human.  I don’t know.  They are usually made in and shipped from China at a great cost to the environment.  Do you know what’s in the glaze on those plates? Neither do I, but I know what’s in my glaze and I know it isn’t lead.

So getting back to the way pots are made:  Open box of clay, cut off a piece, wedge it and either hand build with it or throw a pot on the wheel.  This is the simplified version of how to make a pot.  My techniques will be show in a future video blog.  After the pot is made it is covered in a sheet of thin plastic (the type from the dry cleaner’s and thanks to my sister-in-law who collects it for me I have an ongoing supply) and put on the shelf to dry. Depending on the type of clay it is – some types dry more quickly than others – it takes about 3-4 days of drying before I go to the next step.  Sometimes it’s just 2 days, sometimes it’s 7 days.  You never know. You just have to keep checking the pots every day to catch them at the right time for the next step.

The next step for a wheel thrown pot is trimming.  As I mentioned, the pot is turned upside down and trimmed with various types of trimming tools.  I use the right tool for the job and I use a Giffin Grip which is a tool used to hold the pot on the wheel head as well as centre it at the same time.  The CaveWare plates are turned over and the bottoms are smoothed out, the edges are hand cut and I bevel the edge too.  I give great attention to details.
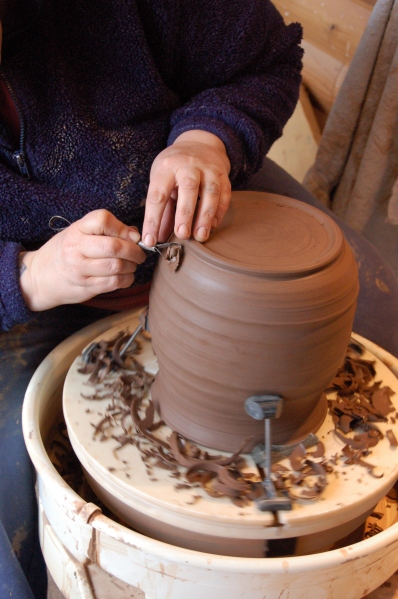
Trimming my compost jar on the Giffin Grip.

After trimming the pot it is put up on the shelf once again, covered in plastic and left until bone dry.  This could take up to 3 weeks especially if it is humid.
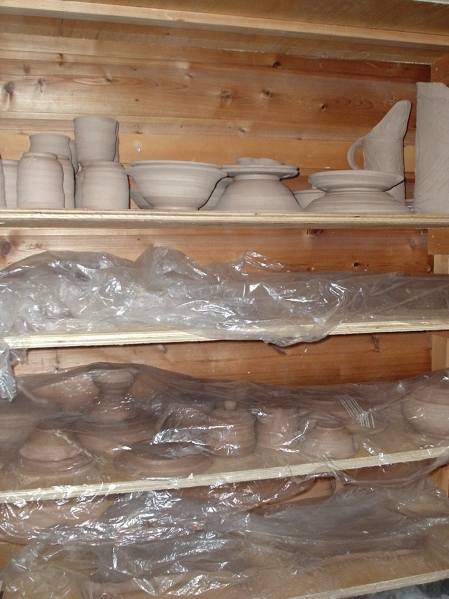
Full shelves of pots under plastic.

After the pots are bone dry I can do a bisque firing.  The first firing is called bisque taken from the French word “biscuit” as in cookie because the pots resemble the colour of a cookie when they come out of the first firing. Bisque firing to a low-ish temperature of 1970 degrees F means the pots remain porous and ready to accept glaze right into the pores of the piece, but they are strong enough to handle without worrying that they’ll fall apart when taking on the glaze.

Glaze can be made up of various clays, silica, a melting component or flux, colourants, sometimes opacifiers and water.  When a pot that is not bisque fired is dipped into a bucket of glaze, the chances of that peice getting too wet and breaking or cracking is greater than if it is bisque fired.

It takes a lot of pots to fill a kiln for bisque firing.  Because the pots have no glaze on them, I can stack pots on top of pots or inside bigger pots.  This method is preferred because it saves boat loads of energy plus the more slowly the kiln cools from all those pots being in there, the better the firing.

It takes about an hour or so to load my biggest kiln for a bisque firing.  In fact, this is what I should be doing right now because I have several orders that I must get out by Monday, so excuse me while I go to the pottery and load my kiln, Big Bert.  Okay!  The kiln is loaded and warming up or “candling,” which means it’s heating slowly to 200 F and then I’m letting it stay at that temperature for a few hours to make sure there is no moisture left in the pots.  212 F is boiling temperature so you can imagine what would happen to the pot if any water was inside and started to heat to a boil.  BOOM!  Hence the reason for candling.  After candling I get Big Bert going and fire overnight.  A bisque firing takes about 6-8 hours and then about 24 hours to cool off enough to unload the pots.

Once unloaded each pots gets inspected for cracks and warping.  If I see either, they get the hammer.  Both can happen but once you get really good at your job it happens less often.  I sand each pot to make sure there are no unsightly bumps or lumps and then I take the pots over to the kitchen and wash them with water (no soap) thoroughly because dust can actually ruin the glaze job on the pot or the entire bucket of glaze can get contaminated with dust and then it has to be disposed.

Once the pots are dry from being washed, which takes about 4 – 6 hours or so because they are porous, I stack them up and take them back to the pottery where foot rings and the bottoms of pots get an application of liquid wax resist.   The wax resists the glaze on the pots where I don’t want glaze.  I use wax resist to decorate some of my pots like this:
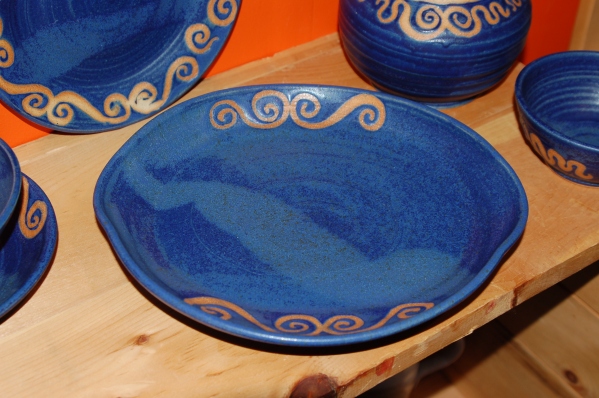
The design on these pieces were created by painting on liquid wax before glazing.

After the wax is applied it takes at least two hours to dry and then I’m ready to glaze the pots.

There is a lot of grunt work that goes on in the pottery.  It ain’t all fun.  Jobs vary from mixing and recycling clay to cleaning glaze spits from kiln shelves, painting kiln shelves with kiln wash so the shelves stay in good shape firing after firing, cleaning the wheel, tools, scrap clay buckets, glaze buckets, and mixing glazes.  There’s more but I don’t wanna bore ya.  I mix glazes when I run low and it doesn’t usually happen on the same day that I glaze. Mixing glazes is fairly labour intensive.  I use tried and true recipes and it involves carefully measuring each raw material into a bucket of pre-measured water and then letting the materials slake or soak into the water.  After that I mix it up with a paint mixer on the end of my electric drill and then I sieve the glaze 4-6 times.  After each glaze is sieved I must clean the sieve thoroughly and the spare bucket as well so I don’t contaminate the next glaze with materials, especially colourants, that I used in the glaze I mixed before.  Because of the fine particles of the raw materials I must wear a respirator and gloves while doing this job.  Silica is one material that is often used in glazes and there is silica in clay as well.  Silica can shred your lungs and cause silicosis or potter’s rot.  I wear my respirator when sanding pots as well.

When I glaze I choose to dip the pots into the bucket of glaze or pour the glaze onto the pots.  Sometimes I use multiple glazes and the effects can be very pretty or pretty ugly.  Before sacrificing a pot I use a test tile to test new combinations of glazes.

Glazes aren’t like paint.  Paint can be easily tinted.  Think about your last trip to the paint store.  Perhaps you’ve heard about a potter who “paints” glaze onto a pot.  They’re probably using underglaze or overglaze to “paint” a design on a pot. Majolica ware is like that and while I admire the technique I’m personally not interested in painting on a pot.  I prefer to work with the wet clay body and I like to use wide swaths of colour and minimal decoration.   In the photo below I have dipped the entire jug into one glaze and then taken a damp sponge and wiped back the glaze to expose the texture.
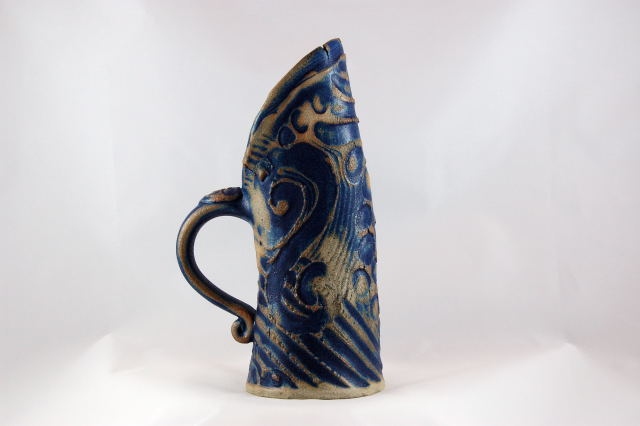
Cool texturing technique taught to me by my clay mentor Kevin Kushnier.

So getting back to the paint thing – glazes aren’t easily changed to suit your individual taste.  A customer who would like to choose a glaze colour should be aware that it isn’t as easy as choosing a paint colour.  You know, you go to the paint store and pick out a colour from a paint chip and the clerk gets some white paint and adds tint.  That’s easy peasy compared to changing or creating a glaze, so when I get someone asking me for a lighter shade of blue or telling me that they want a nice pinkish gray – something that is not already in my glaze pallette, well unless you have a couple of years to wait while I test a new glazes in between making pots for shows and for paying customers, it probably isn’t going to happen.  I make new glazes when I have time to do so and then extensive testing goes on before I will use it on a pot that will be sold.  I have to test it for durability, chemical leeching, how it fires on each of my clay bodies – and I presently use 3 different clay bodies…make that 4.  Right now I’m thinking of making a glossy black glaze and I’ve been thinking about that for about 3 years.

I usually give myself a 4 – 7 days to glaze a load of pots, but I often times have to pull several 12-14 hour days in a row if I have a deadline.  Once the pots are all glazed and the foot rings are cleaned up (sometimes even with wax resist small beads of glaze can stay on where I don’t want it) and the textured pots are wiped back, I can start to load the kiln.  Loading a glaze kiln is a bit more tricky than a bisque.  None of the glazed pots can touch because they will fuse together if they do.  I have glazes that fire well at the very top and very bottom of the kiln (the “cool” spots) and I have glazes that fire well in the middle (the hot spot) and glazes that fire well just above the bottom and just below the top.  So it’s like a jigsaw puzzle sometimes and it has taken me years to get this down.

With the kiln loaded I candle it for a couple of hours or until I feel no more moisture coming from the freshly glazed pots inside.  I use a very scientific method to determine this:  a mirror.  If the mirror steams up, it’s still wet inside.  When it’s finally dry, I turn up the kiln and let the computer controller do its thing, usually over night.  When I wake up the next day it’s well before the end of the firing which takes on average 12 hours.  I watch for the pyrometric cones to melt exactly the way I want them.  Telling you about pyrometric cones is a blog for another day, but suffice it to say that I keep a careful watch on my cones and when they melt just right, the kiln gets turned off and then I wait for 24 – 36 hours for the kiln to cool down before I can open it to see what treasures are inside.
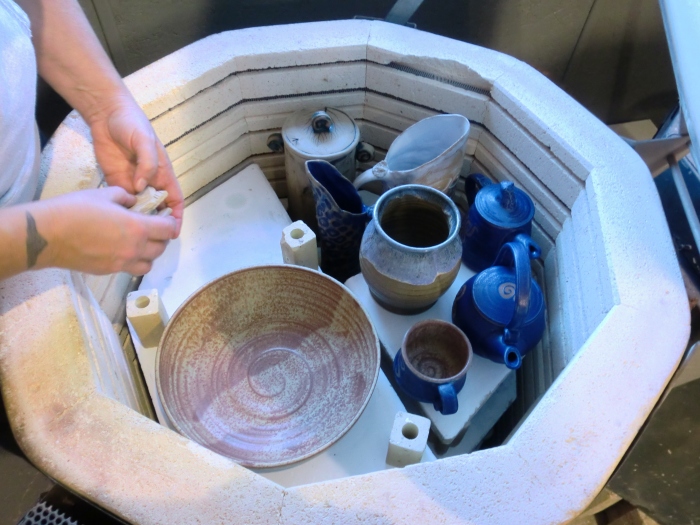
Kiln opening fall 2010

Posted in my work | 14 Comments

The Beauty

“Let the beauty we love be what we do.” ~Rumi

Once long ago, someone asked me if I wasn’t a musician what would I be?  In an instant I blurted, “I’d be a potter!”  Where did THAT come from?  It was perhaps an intuitive answer.  It’s not as if I admired and studied pottery for years and years before I decided to try it out.  Sometimes I wonder if I made pots in a past life.

I took my first pottery class in 1986 or thereabouts, because I was a little bored.  My boyfriend was jealous of the fact that I was in a band, that I had rhythm and could play a few musical instruments.  Couple that with the irritating position of actually being IN a band (it’s like a dysfunctional family at times, especially when you’re in your twenties), I was ready to put my guitar in its case and tuck it away for a few years.  That’s when I started taking pottery classes.  I like creating things with my hands.  Creating beauty – whether its playing music, making pottery, or something crocheted, knitted, sewn or grown, it’s what I do.

I took classes for about a year or so and eventually left my boyfriend because no matter what I did he seemed to find fault with me.  I felt free to take up my guitar once again and I began writing songs.  A time came when I put away all of my clay things because the business side of growing a music career took so much time and energy.  It was a time of deal making, finding gigs to play and networking for hours upon hours each day.  As time passed it didn’t feel creative anymore at all.  I didn’t even have time to write songs. Eventually the business side of the music industry made me shudder and wince and I finally gave it up when I stubbed my toe on a bag of clay in my friend’s kitchen and began to work the soft brown stuff with my hands re-discovering my creativity.

Yesterday while in the pottery studio making Matcha tea bowls for La Brulerie, a specialty food shop and coffee roasting house in Hull on St. Joseph, I thought about Japanese tea ceremonies and their beauty.  I thought about rituals and celebrations and how food and drink are usually involved.  I’ve always felt that the pottery is as much of a work of art as the food that goes into the pottery, so when people tell me they are not creative I like to point out that the food they cook is art; that the table they dress for a meal is art. They stop and reflect.

I hope you find some time today to reflect on your own creativity.  Seeing as how the New Year has begun my wish for you is that you will find something that moves you into a place where you can practise creativity.

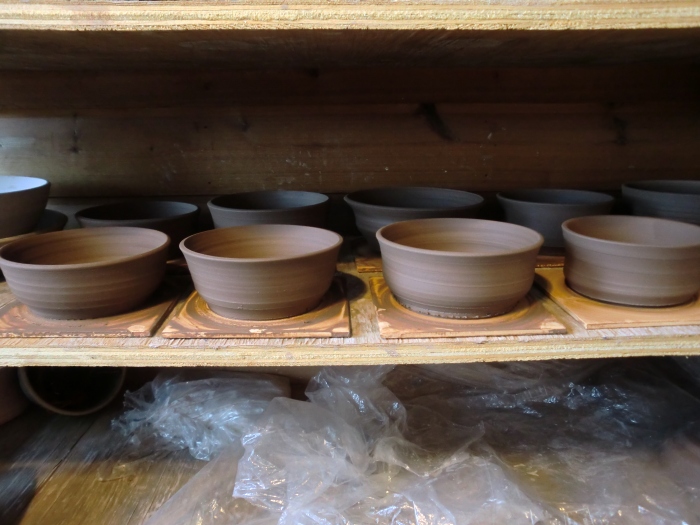
Freshly made raw Matcha tea bowls

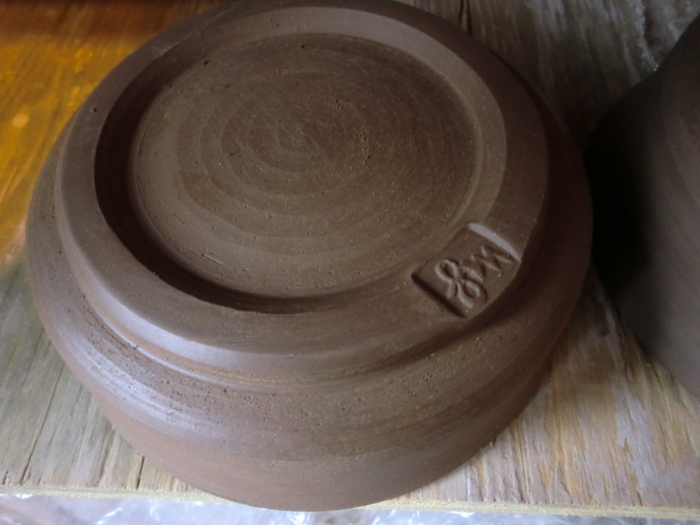
Raw finished Matcha tea bowl with "LM" stamped on foot ring.

Posted in my work | 16 Comments

Tutorial – How to recycle clay in 3 easy steps

Step 1.

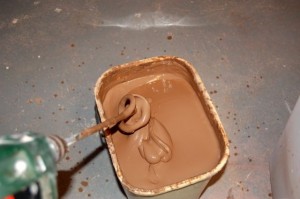
Toss all your scrap clay and clay water/slurry into a large bucket. Collect until the bucket is 75% full.

The bucket of scrap clay just before mixing. Into the bucket goes all scraps, the slurry water from the splash pan and the water from my little bucket I use when at the potter's wheel. Nothing goes down the drain! Note the clumps of clay just under the water line.

The bucket of scrap clay just before mixing. Into the bucket goes all scraps, the slurry water from the splash pan around the wheel head and the water from my little bucket I use when at the potter’s wheel. Nothing goes down the drain.  Note the clumps of clay just under the water line.

Step 2.

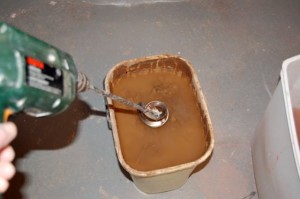
Use a paint stirrer on the end of a drill to mix the clay.  Go slowly to start so you avoid splashing liquid clay everywhere.

It’s a little messy, but I can’t imagine throwing out clay that can this easily be recycled.  I recycle about 200 lbs of clay each year!

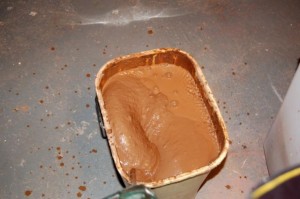
Mix until smooth, like cake batter.  Mmmmmm…cake batter…

Step 3.

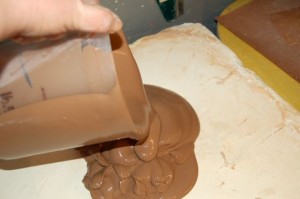
Now it is ready to pour onto your plaster slab for drying.

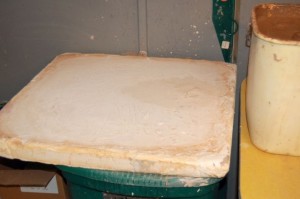
This is the plaster slab I use for drying the clay. The clay is not completely dried, however. The plaster draws the moisture out of clay. I remove the clay from the plaster when it’s a good consistency for wedging (kneading), cut it into smaller pieces and bag it and date it.  I use the clay when it has “aged” a year or more.

Making a plaster slab isn’t too tricky or labour intensive and I will blog about it one day when I make a new one, as mine is wearing down and slowly disintegrating after being in use for about 7 years now.  The trick is to buy FRESH plaster and use the plaster right away.  Plaster takes on moisture from the air and if you have old stuff it probably isn’t workable.  I had a bag of plaster that I bought and then stored for two years.  When I decided to use it, it was as hard as a rock and I had to throw it out.

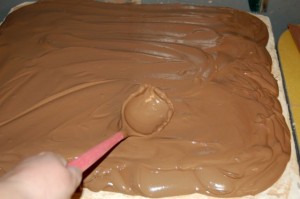
I use a jug or a ladel to scoop the clay out of the bucket and onto the plaster slab because I can’t lift the whole bucket to pour it out.  No need to hurt myself, is there?

I smooth out the clay and make it a consistent thickness on the plaster slab.  It takes about a week or so to firm up so I can remove it from the plaster.  Each batch of recycled clay weighs about 40-50 pounds after the water has leeched out.  Ka-ching!! That means I save about $30 or more each time I recycle a bucket of clay.

Posted in How-to, recycling | 5 Comments

La poterie est ouvert! The Pottery is Opened!

It’s just 9 days until Christmas.  Do you know where your holiday decorations are?  Why, they are here at the pottery, just waiting for you to come and get them!  Just give me a call and let me know when you can come by so I can put the kettle on for tea.  If you can’t make it by in person, well, there’s always the mail.  I would be happy to pop into town with your parcel to be delivered in the good hands of Canada Post.  Don’t worry about breakage.  I know how to wrap breakables like a pro.  Wait a minute.  I AM a pro!

I have Gingerbread men ($10) that look good enough to eat, but DON’T!!  You’ll break your teeth!

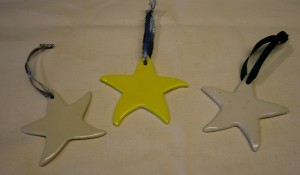
I have dancing stars ($8) in white and yellow…

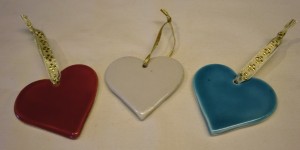
Hearts ($8) in red, blue and white…

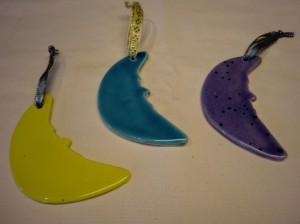
Crescent moons ($8) in blue, white, yellow and purple with groovy green bursting crystals…

I have cute little teddy bears ($6) in terracotta clay…

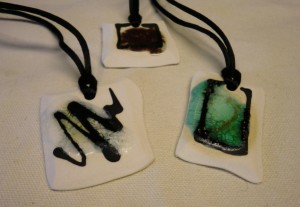
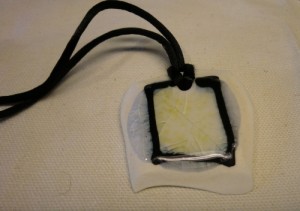
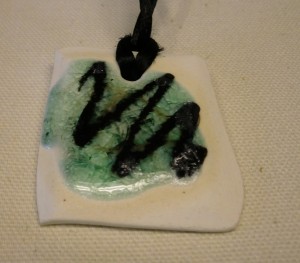
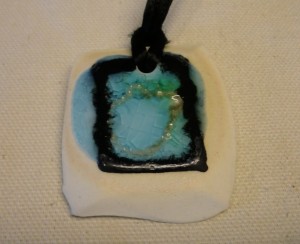
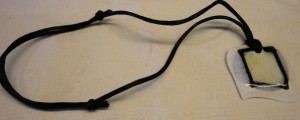
For those on your Holiday List for whom you are searching for something unique I have some brand NEW original jewelry – Molten Glass Pendants ($15) with an adjustable black silk cord, made with white or porcelain clay framed in black glaze and inset with stained glass pieces in a variety of colours…

White glass, deep red and green layered glass.

Gold glass.

Adjustable silk cord.

The stained glass came to me from a friend who got it from a client.  The glass shards are scraps from someone’s foray into stained glass art.  It’s another way in which I have recycled something that could have ended up in a landfill site.  The small shards are placed on the clay square after I’ve framed the clay or made a squiggle with a black glaze “pen” and after firing they’ve turn into something beautiful!

Green layered glass.

Blue layered glass.

I love glass art.  I love watching glass blowers work.  On trips to the city I often hit a few thrift stores in search of glassware and pottery and I’ve found more than a few gems that delight me.

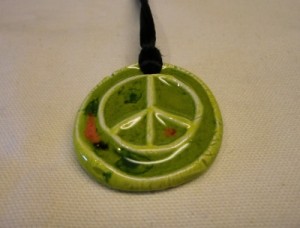
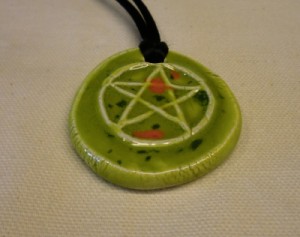
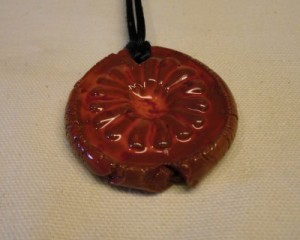
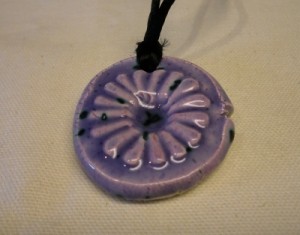
I also have these necklaces I call “Hippi Pendants.” ($13)

Peace, baby!

Here I’ve stamped some clay wads with my self-created stamps and glazed them with – you guessed it! – some hand-me-down vintage bursting crystal glazes from the 70’s.  Those little pots of glaze came to me from an elementary school art teacher.  They were all dried up and I didn’t know if they could be used, but I added a bit of water, gave the glazes a good stir and that’s all it took!  I love the names of the glazes.

This one is called “Tossed Salad.”  Notice the small green, red and orange specks.  It indeed looks like a tossed salad!

And this one is called “Firedance.”  I carved a stamp of the 16 petal flower that is on the Romany flag and since I have Gypsy roots, this design is special for me.

A few years ago I discovered that the bursting crystal glazes were making a comeback, so I invested a bit of money in some new glazes as the others were getting used up.

This one is called “Purple Haze.”  I used the same glaze on some of the crescent moons.

I have many other designs in the Hippi Pendants.  Some of them are available at The Old Chelsea Slip Cover shop located at 213 Old Chelsea Road in Chelsea, Québec.  I know, eh?  What in the world are necklaces doing in a slip cover shop?  Well, there used to be a gallery on the property and there is a bed and breakfast there as well, so Manon decided to convert the gallery into a “cabin” of sorts, offering family or group sleeping quarters in addition to the B&B.  They’d asked me to install some art there before they decided to convert the building and when I mentioned I had these necklaces they thought it was a good idea to give them a try in their shop!

I wish all of you last minute shoppers all the best in your search for just the right gift and thanks for supporting local artisans.  It means we can keep doing what we love AND buy groceries!

Posted in my work | 8 Comments

Green, green, my love is green.

I am a potter; a clay artist.  I love to play in the mud.  I am a creator or functional things because I’m a practical gal.  The pleasure I get from eating or drinking from my own (or others’) hand made vessels is enormous.  I don’t ever think how wonderful I am for having made the thing.  I only think of how wonderful a piece it is and how I feel only partly responsible for it.  I give equal credit to the fire and the glaze for transforming the clay piece into a thing of beauty.  When people compliment me on a piece I’m polite and say thank you, but honestly don’t feel 100% responsible for the piece coming into this world.  Of course I realize that I am 100% responsible for if it weren’t for me making it in the first place, there would be no pots coming from my studio.

I can remain objective about a piece, smashing those that don’t make the grade, although I gave up smashing years ago.  I prefer to go the greener route of throwing the dried clay piece into the scrap clay bucket for recycling before it gets fired, because once fired but still ugly, it can only be smashed to bits and used to fill potholes.  I’d rather not waste my time on something that I don’t find appealing from the get-go.

When I was 10 years old I signed up for something called Clean-a Thon.  Neighbourhood parents sponsored kids to go clean up a stretch of road somewhere in our little town.  Teachers and students picked up trash for an entire afternoon behind the Star-Lite Drive-In Theatre.  We were on Pandora Street and we were armed with trash bags.  I think there was one stick with a nail in the end to assist us and we shared it the whole afternoon.  There was such an abundance of trash!  Everything from beer bottles to popcorn boxes to hubcaps to articles of clothing.  Since that day I have been completely disgusted with litter bugs.
As a result I started recycling early.  I was recycling stuff before the blue box was a twinkle in someone’s eye.  I have converted room mates, boyfriends and parents of both into recyclers.  I’m a pack rat because I’m keeping stuff for a time when it might come in handy.  You can make art out of almost anything!  And I’m pretty sure there has been more than one person who has made art from trash.

Speaking of recycling, I do a lot of that in my studio.  I recycle my clay and I also recycle water.  How?  All of my scrap clay goes into a bucket and all of my clay water goes into the scrap clay bucket too.   Once the bucket is filled, I use a paint stirrer on my drill to mix the scrap clay and water into a thick liquid clay and then I pour it out onto a plaster slab for drying.  The plaster leeches moisture out of the clay.  The drying time is anywhere from 4 – 8 days depending on the weather/humidity.  Then I turn the clay out onto my wedging board and cut it into squares to fit into my recycled plastic bags.

Hand-Me-Downs
I’ve been gifted with clay that another potter might find too daunting or time consuming to recycle.  I’ve been given ancient bags of pre-mixed glazes that two potters had on hand and knew they would never use because they just don’t fire to “that temperature.”  I’ve had raw materials and tools, a kiln and vintage pottery magazines fall like manna from the heavens right into my lap.  This is how I knew for certain that pottery was to be my new career and that this work was actually very eco-friendly.

Yes, eco-friendly.  In addition to recycling my clay and clay water, I believe it’s eco-friendly because I fire in an electric kiln which is powered by hydro.  The water falls and energy is created.  No nukes here.

Before one can have recycled clay, one has to buy clay, and I do buy Canadian clay (Plainsman).  I also buy a small supply of clay that is mined in California (Laguna clay).  The Laguna clay is not purchased often.  I bought four boxes of it this fall and before that I bought some in 2007.

I use some locally sourced raw materials for glaze and keep my eyes and ears opened so I can buy retiring potter’s raw materials.  The raw materials I purchased back in 2002 when I started my life as a potter, were purchased as a package deal along with the 2nd hand kiln.  I got a huge stock of raw materials from a retiring potter, most of which I still have plenty.

One thing I use has been shipped overseas to get here.  Cornish stone.  It comes from the U.K. and the last time I bought a bag of Cornish stone it was from a potter who had 50lbs of it that she simply wasn’t using.  I took advantage of that because one of my most popular glazes is made with Cornish stone and because it comes from overseas, it is very costly.

How green is it to buy locally made pottery for the consumer?  Buying locally made anything means you have reduced your carbon footprint because it’s not being shipped from overseas to get to you.  If it breaks, chances are you’ll want to glue it back together rather than throwing it out since you’ve most likely met the potter who made it and there is an emotional attachment to the piece.  You bought a piece of their life, love and art, so gluing makes sense.  If it truly is smashed beyond recognition, then it won’t pollute if you throw it out.  Chances are it’s going to be a piece of human history that’ll be dug up thousands of years from now.

Posted in recycling | 6 Comments