#1 Change your business name so you have to make a new sign.
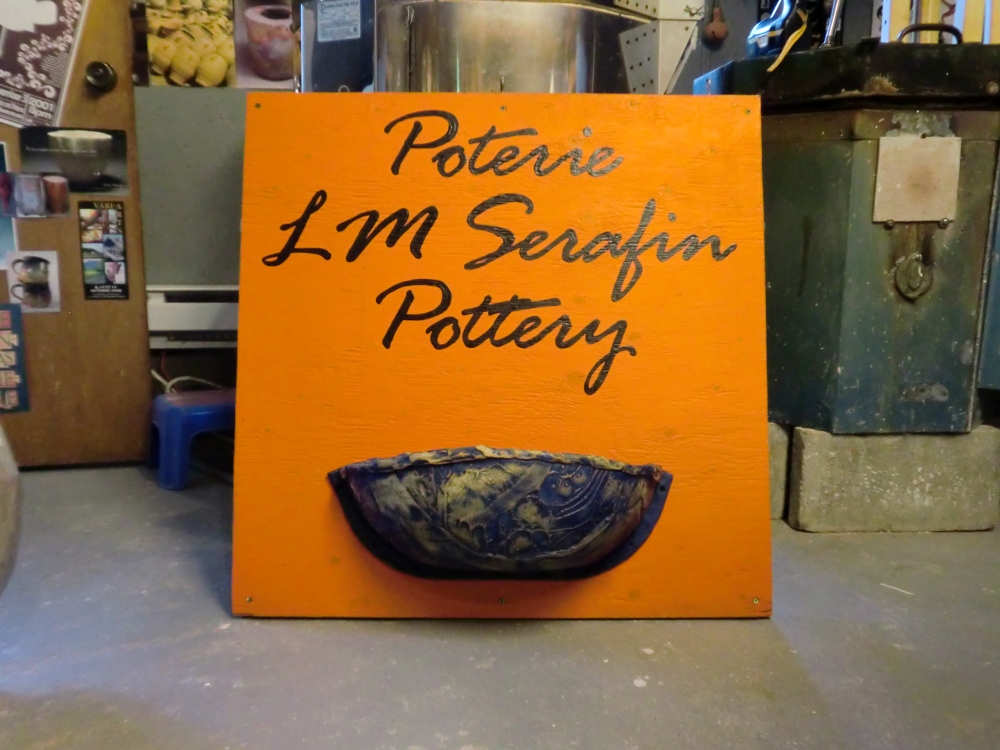
It came to my attention that the name Poterie du Lac la Blanche/The La Blanche Lake Pottery, although catchy, was not going to cut it anymore. I had to start using my real name as my business name and the sign has to be bilingual because I live in Québec so “Poterie LM Serafin Pottery” it is and it’s perfect. Simple, to the point, and not much lettering to paint. Bonus!
My background as a sign painter:
Self-taught. Fairly good penmanship. Have cheap paint brush and a “can-do” attitude.
#2 Find that piece of wood you had intended for another project.
There it is amongst a bunch of other pieces of wood propped up against the wall in the garage. A lovely piece of good quality plywood measuring 32″ x 32″.
#3 Paint it orange so it sticks out like a hunter in the woods during hunting season.
The reason my sign is orange is because I decided to paint the walls of my pottery shop orange and I had leftover paint, so naturally being the spendthrift that I am, the sign got painted orange too. Well, actually I decided to paint the interior of my shop a lovely, low-key terracotta but something strange happened at the paint store that day. I lost my mind and chose a very bright orange that mimics a Hawaiian sunset. I haven’t been to Hawaii, but I have seen photos. And movies. Luckily the pots I make look great against an orange background! Whew!! And doubly lucky the sign really does stand out by the roadside in every season. Happy accidents are awesome. My life is built on them.
#4 Pick a font that is easy to read.
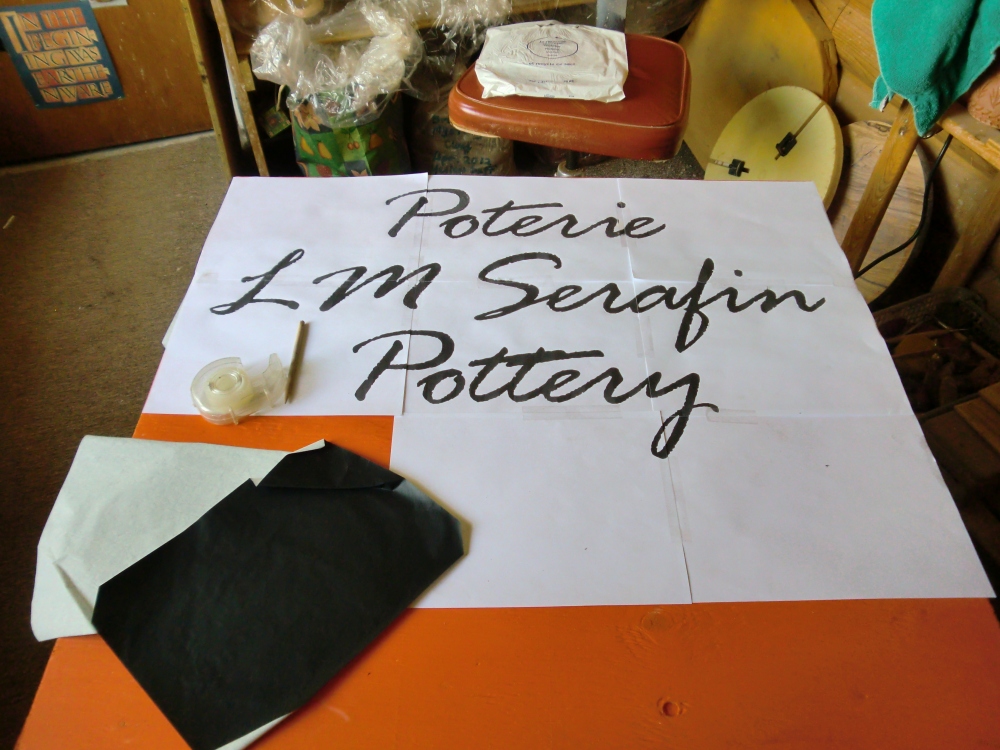
For the purposes of this sign, I decided to choose a font by simply going through the fonts available in Office Word 2003 and choosing something easy to read that sort of mimicked the maker’s mark I put on my pots, which is “LM.” I then printed out the sign to size (on several pieces of paper from the printer).
For other signs I have made I have used block lettering and free handed the lettering on the signs in pencil, but measured height and distance apart from each letter and each line of print. This is time consuming but making any sign is time consuming, so buck up and get ‘er done!
The signs pictured below:
The one on the left was painted on a white shelf I found at the trash house. I found two shelves and the 2nd one is attached with hinges at the top and serves as the back for this “sandwich board” style sign. The small sign on the right is also a sandwich board sign, but I had the wood laying around from another project, already painted white. Lucky me!
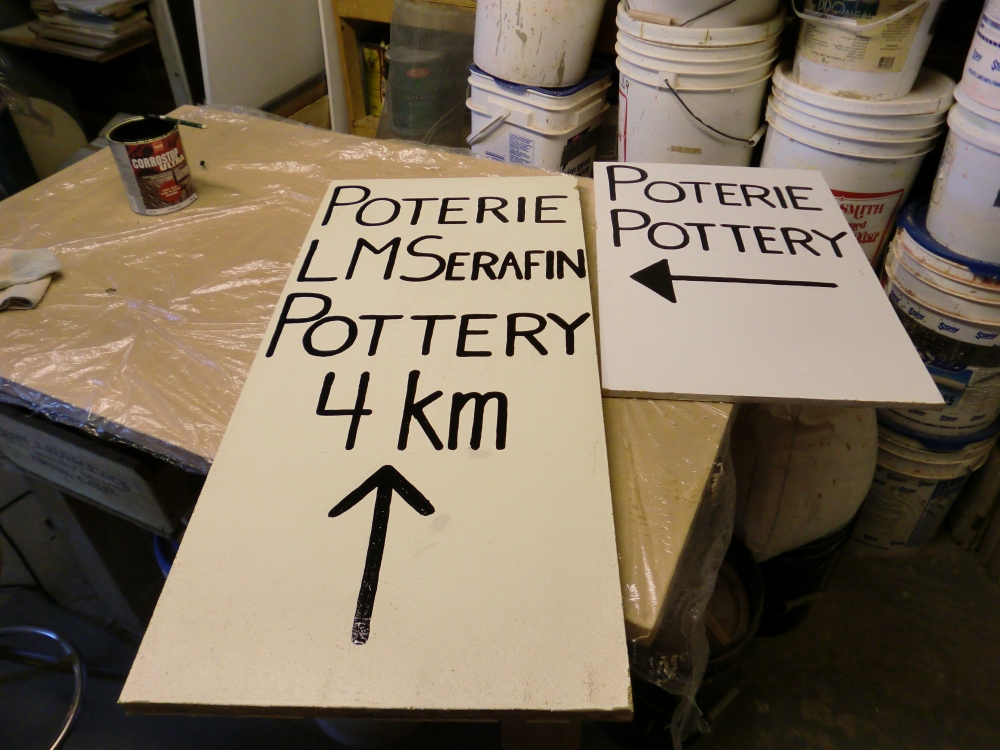
New signage painted just in time for my 6th Annual Summer Sale that was held in late June. The signs are out when the shop is opened…or when I actually remember to put them out!
#5 Decide where the lettering should go and if you would like anything else on the sign.
I chose to put my name at the top and leave room at the bottom for a half pot/planter to add some colour and beauty to my sign with the pot full of flowers. More on the pot-making aspect later.
#6 Carbon Paper is your best friend when using this sign making method that I dreamed up a few years ago. The idea is probably not original, but then again, maybe it is!
I used this method previously and it works well if you are patient and careful. Without patience or care you end up with a crappy sign, so have both and you will be successful with your sign.
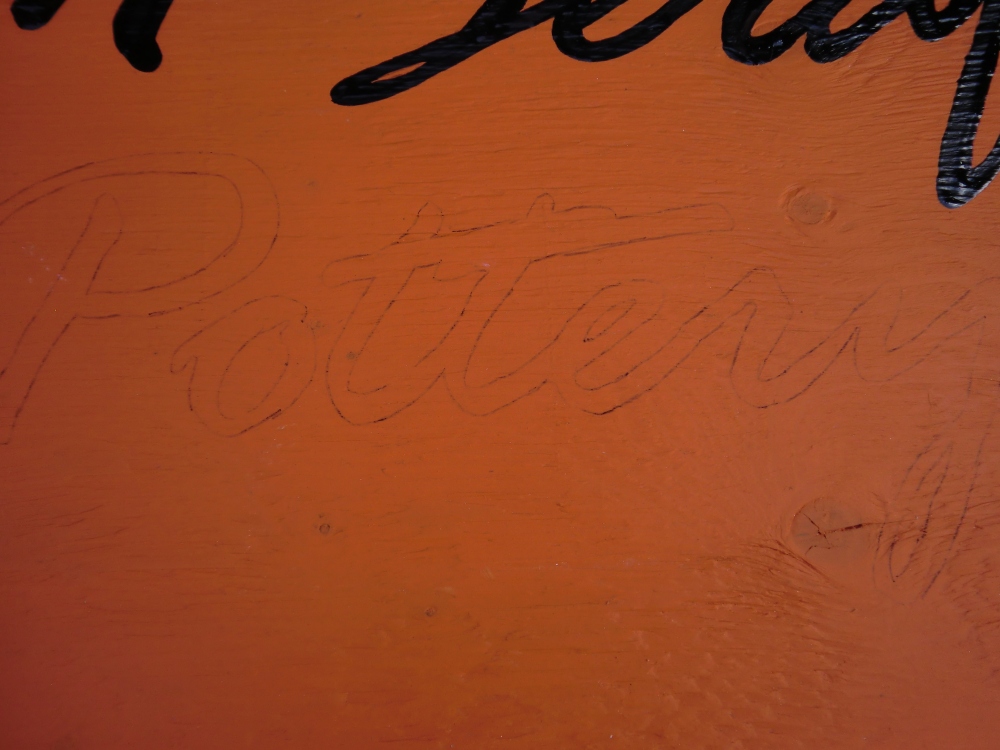
After printing out your business name/lettering to size (i.e. the size of the actual sign), tape the pieces of paper together and place them on the wood, taping the corners down. Slip the carbon paper under each section and trace your lettering onto the wood. Press hard to get a good transfer and you only need to trace the outside lines of the letters. Those will be your guidelines when painting in the lettering.
Pictured here: the paper sections taped together and carbon paper (the black stuff).
Here’s a photo of the lettering after tracing. I’d already begun to paint the sign at this point.
#7 Paint in the lettering
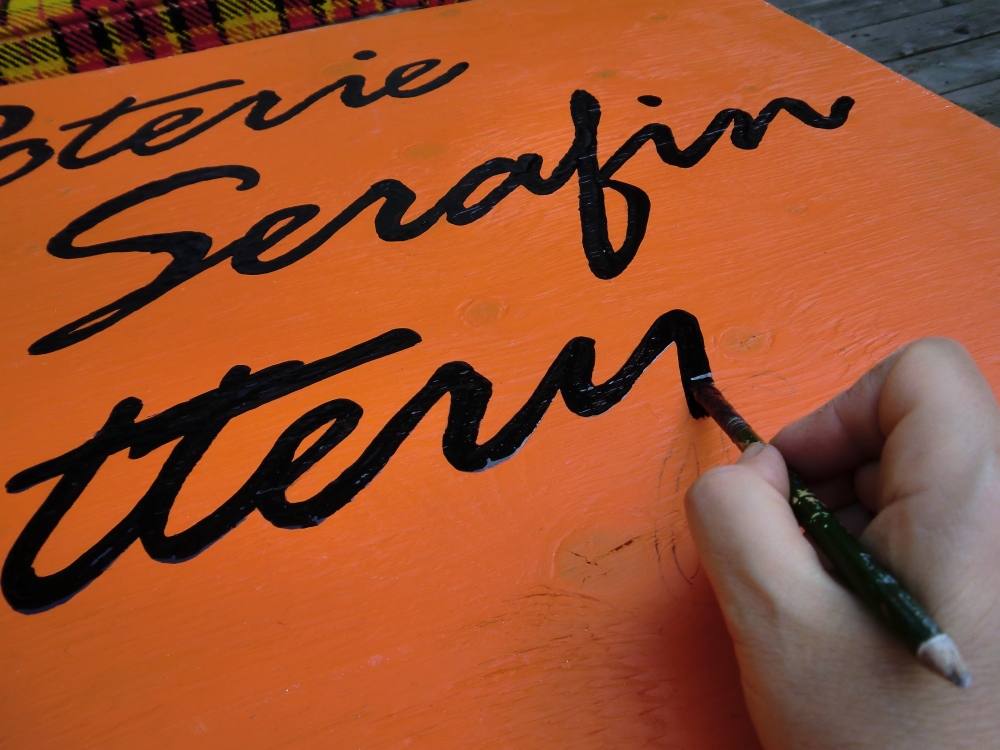
I used paint an oil based Tremclad paint for metal only and I think it’s just fine for sign painting. As they say, make due with what you have and this is what I had.
I took the sign outside to paint because paints, especially oil based paints, are incredibly smelly and permeate the entire house. Eyoo!! Paint outside!
Once the lettering has been transferred on to the wood via carbon paper, just stay inside the lines with the paint. It helps if you drag your hand on the board while painting. It gives you a lot of stability.
#8 Let the paint dry completely.
If you leave it outside to dry overnight you’re likely to find a few bugs stuck in the paint, so bring it inside and put the sign in the garage. Let the paint cure/dry completely.
#9 Add something pretty or unique to the sign!
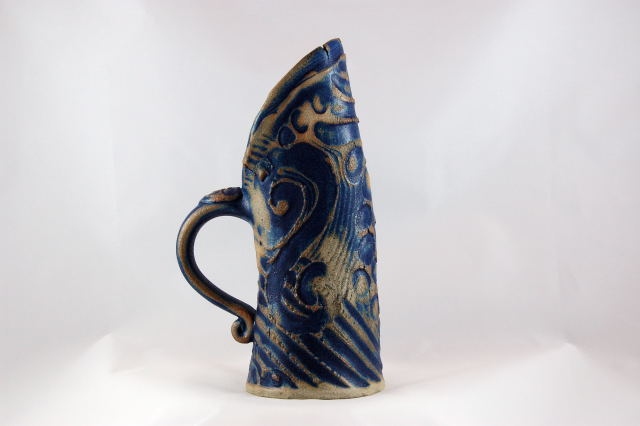
It could be your logo or in my case, a planter. That meant making a humongous clay pot and cutting it in half then when finished I would mount it on the sign. I wanted the pot to be my signature style and for me that is the textured pottery that I make, like this:
#10 Construct the unique thing.
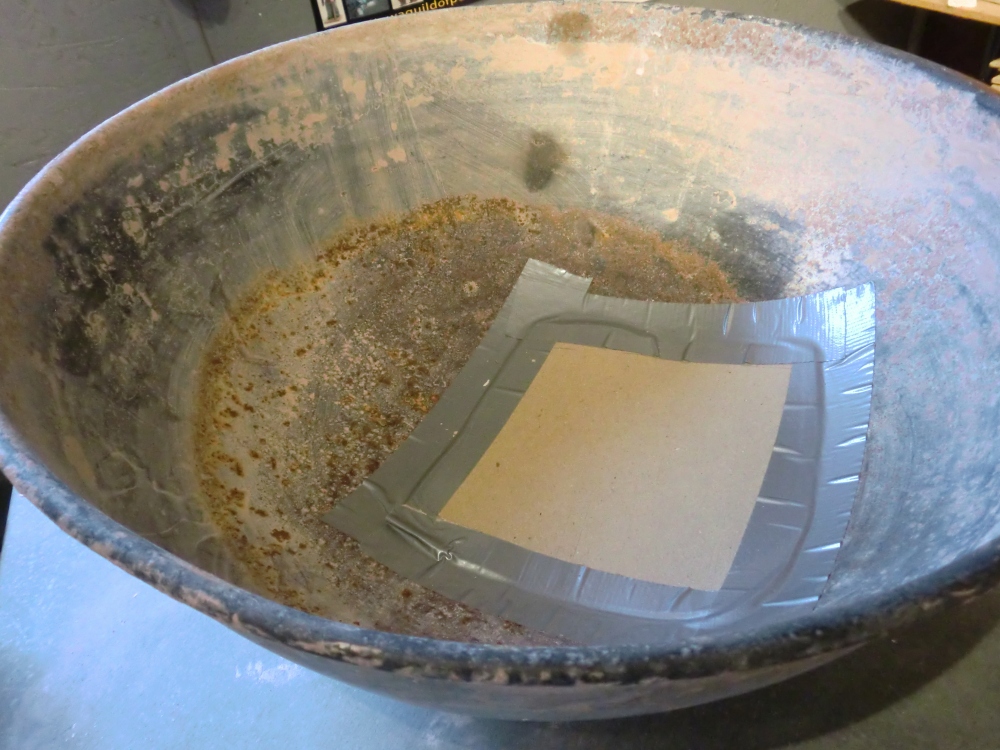
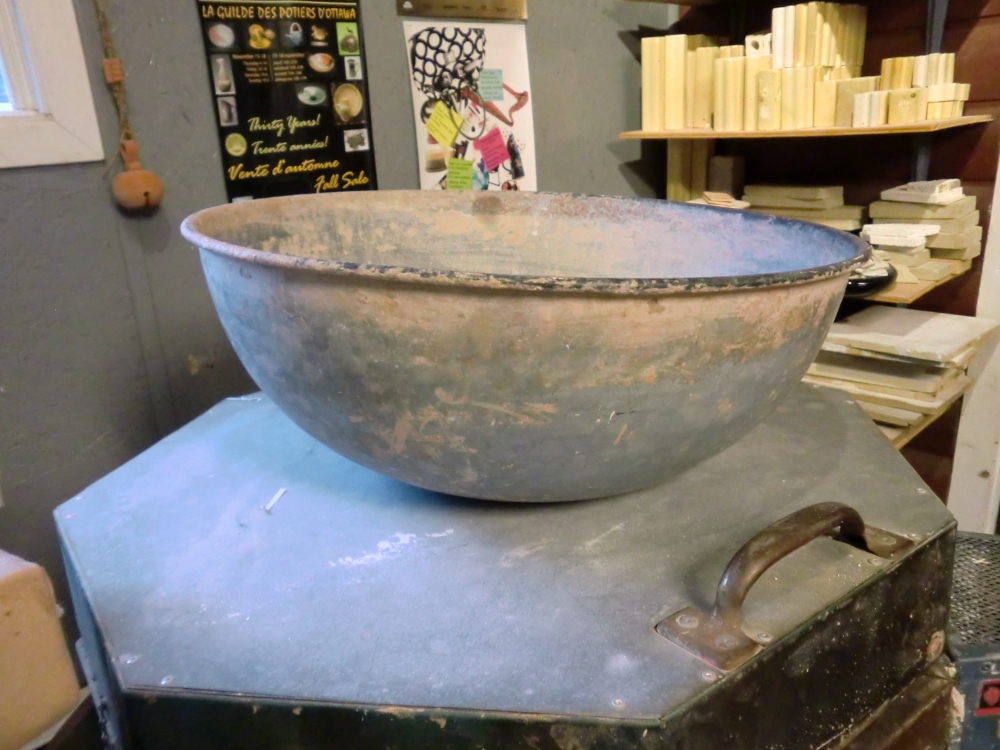
Because the textured pottery is made by hand (without the aid of a potter’s wheel) I first had to find some kind of mold in which to press the textured slabs to give shape and support. I have an old potter’s wheel that had a splash pan permanently fixed to it. When I got the wheel I was quite a bit larger than I am now and my belly was firmly pressed up against the splash pan as I tried to squeeze myself onto the seat of the wheel, but it was a no-go. The seat of this old wheel did not adjust. Because I couldn’t fit we made a decision to cut the splash pan off of the wheel so I could use the danged wheel. I tried using the wheel without a splash pan and it was completely ridiculous. I got soaked right through my clothes throwing the first pot and there was clay splattered everywhere! Suddenly I found myself in possession of two potter’s wheels that did not work. One with a fried circuit board thanks to an electrical storm and a hand-me-down wheel that I couldn’t use because I was too fat, then too wet. But I kept that old splash pan because I had a vision and it made the perfect mold for my new pottery planter!
#10 a. Make it work.
I patched the bottom then lined it with paper. Old telephone book pages makes for a great liner for molds in the studio.
#10 b. Create!
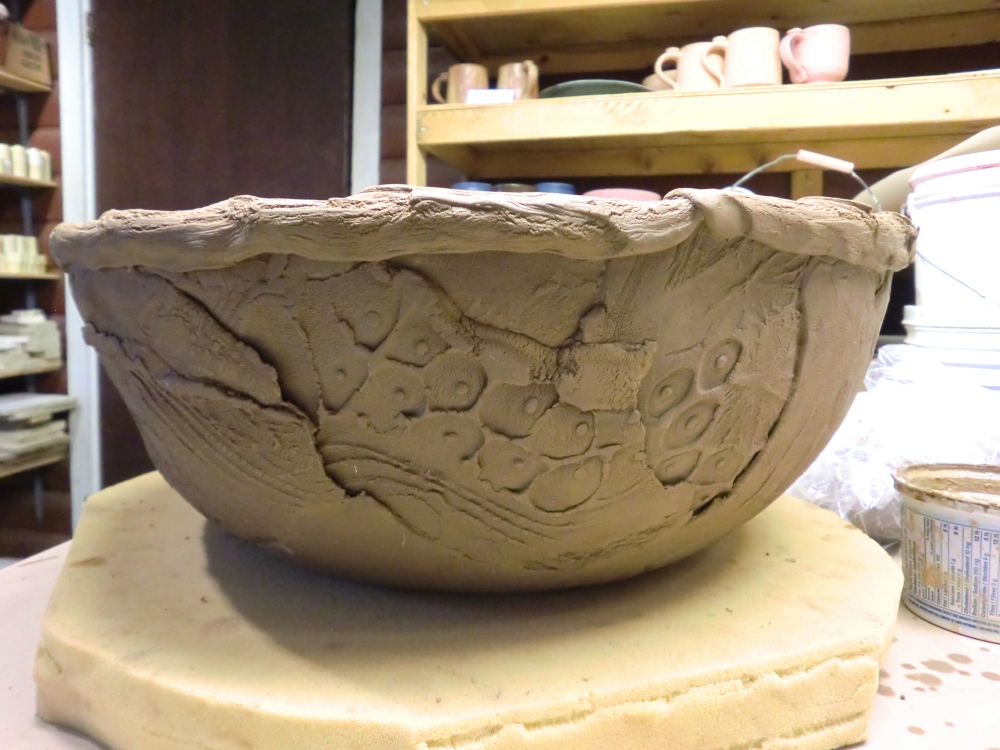
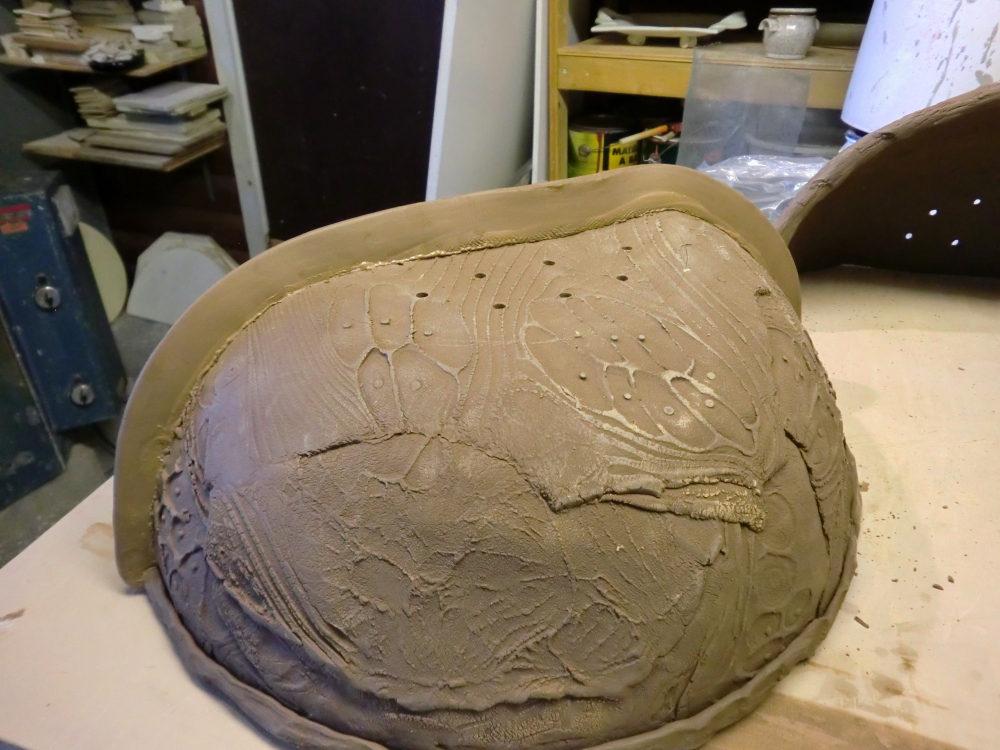
I made the textured slabs (now this part I can not show you or I would have to kill you), and then tore them apart and “patch worked” them into the mold. After the pot dried for a few days I removed the splash pan mold and this was the result.
#10 c. Work on your vision.
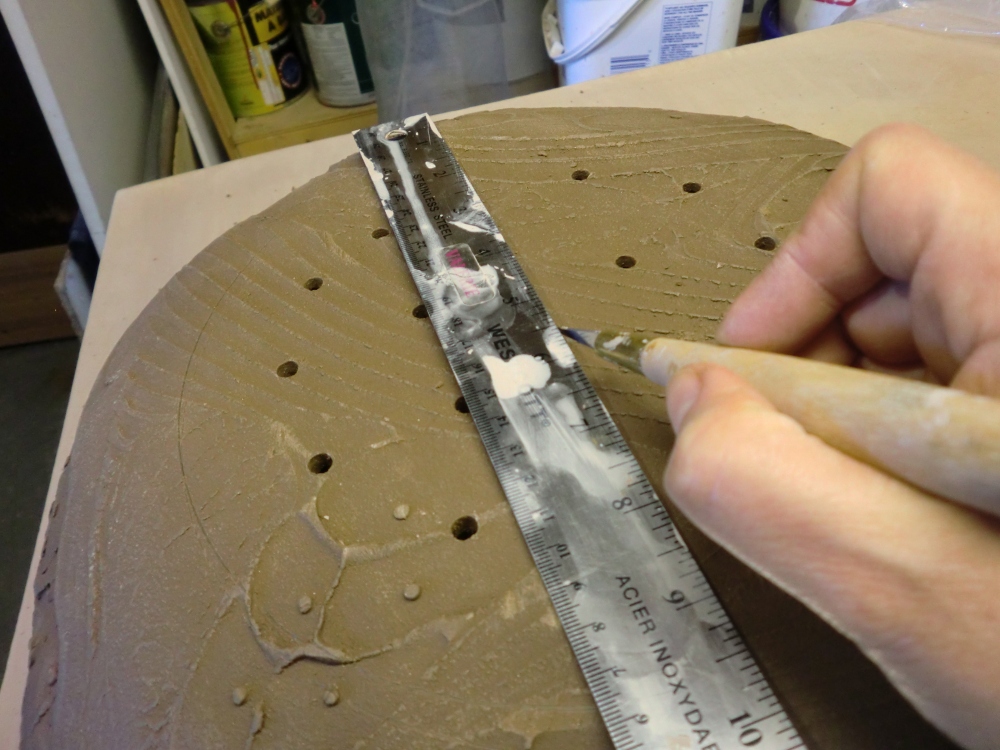
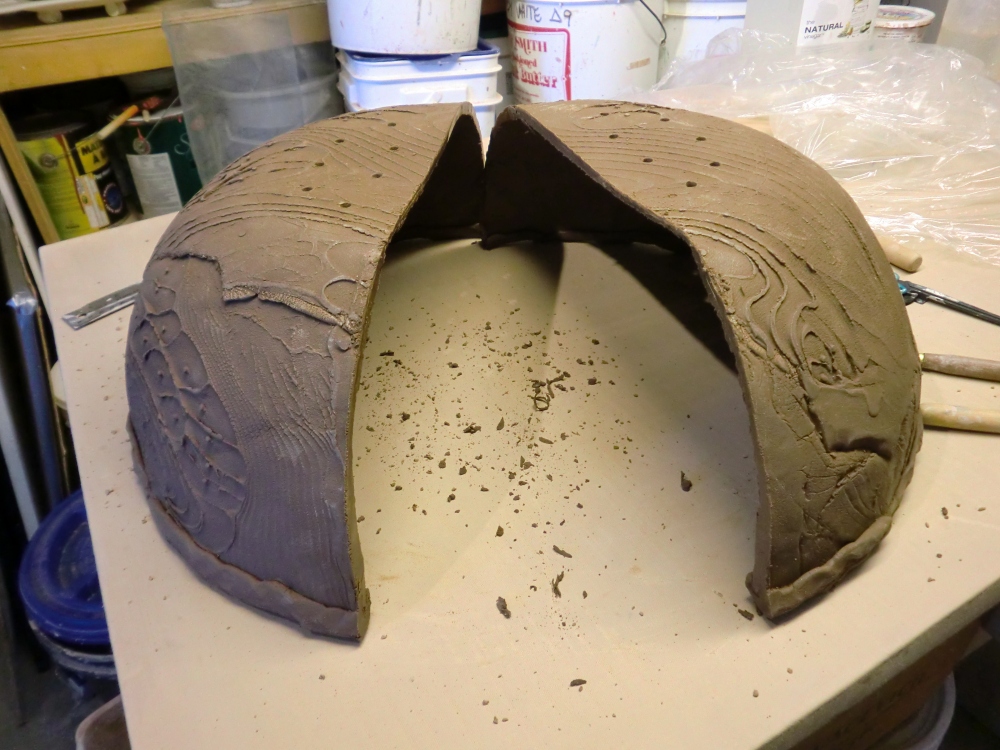
The pot dried for a few more days then it was time to make some drainage holes in it and cut it in half. Half went on the sign that is at the top of the road and the other half will go on the sign that will be hung outside my shop, hopefully before summer is over.
#10 d. Have faith in your ideas!
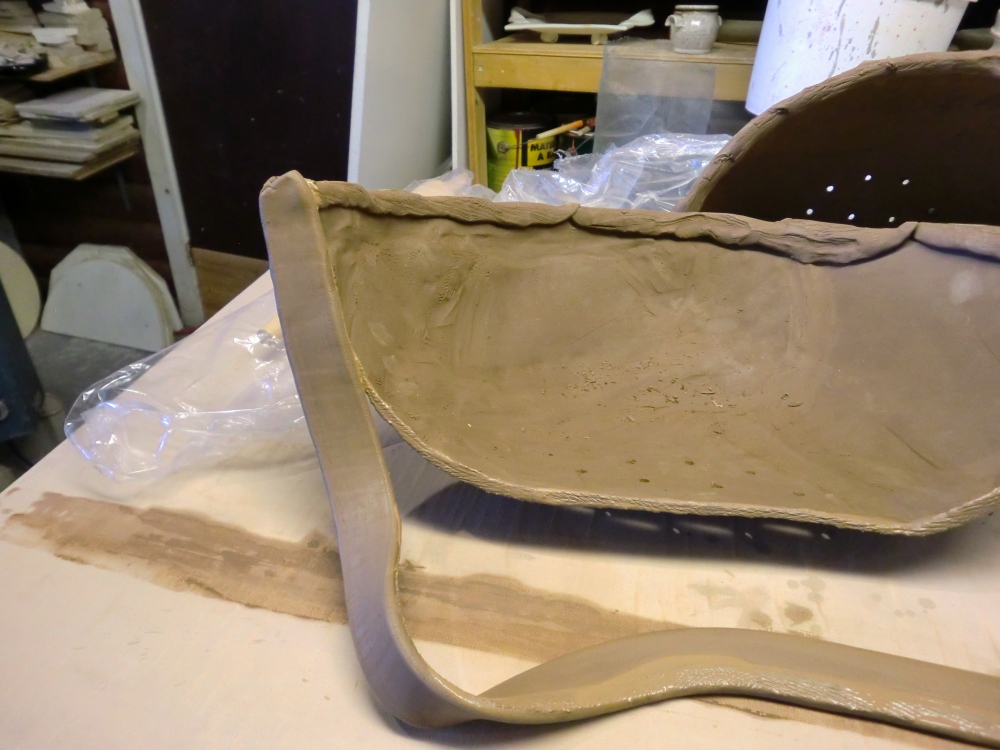
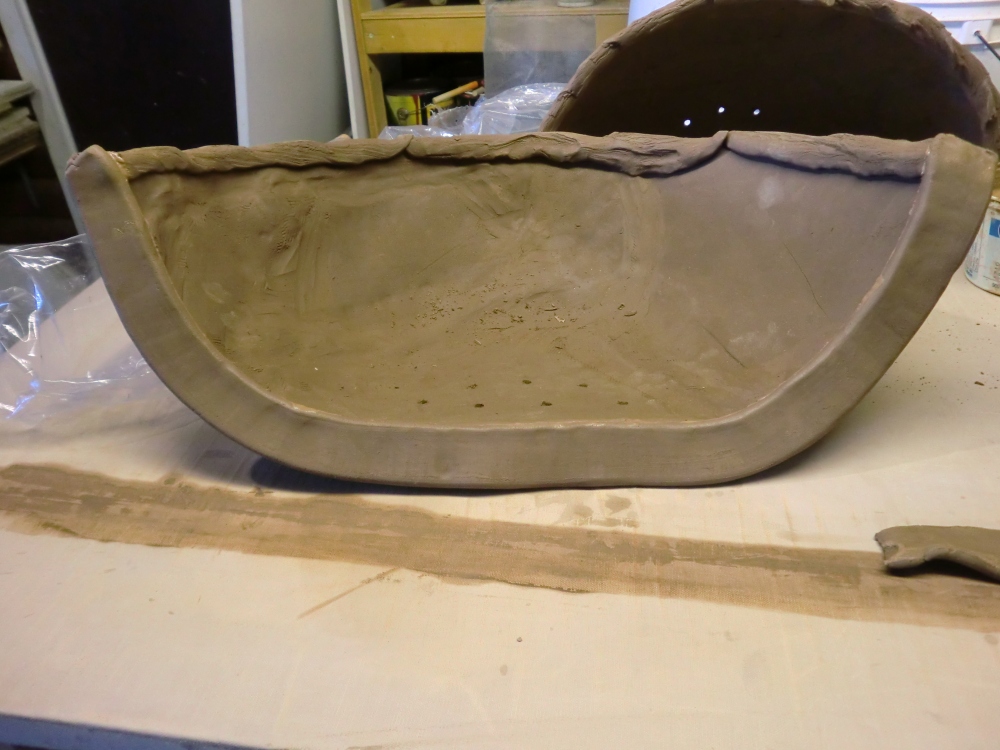
Now I needed to add a piece of clay like a flange onto the freshly cut pot so I could attach the pot to the sign later. I’d made a sign with pots on it before and I used tile cement to attach the clay pot to wood. It was messy, wasn’t easy to glue two unlike materials together and the cement yellowed with age and didn’t look nice.
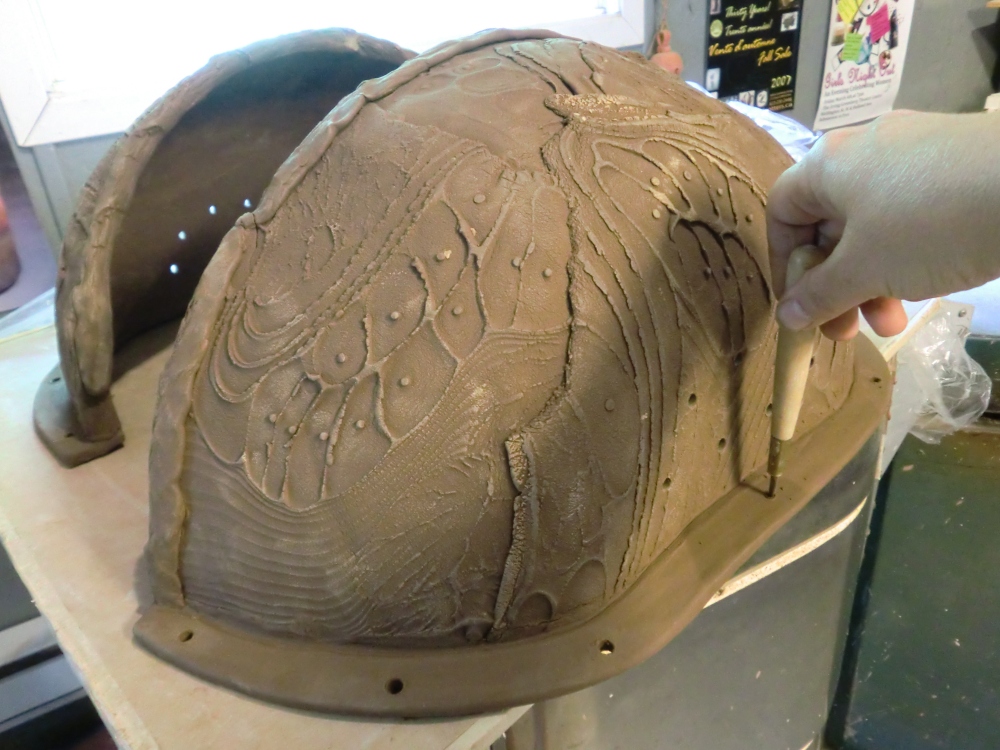
I rolled out a nice fat coil then flattened it, scored the edges of the half pots and attached the flattened coil like this.
#10 f. Work gingerly.
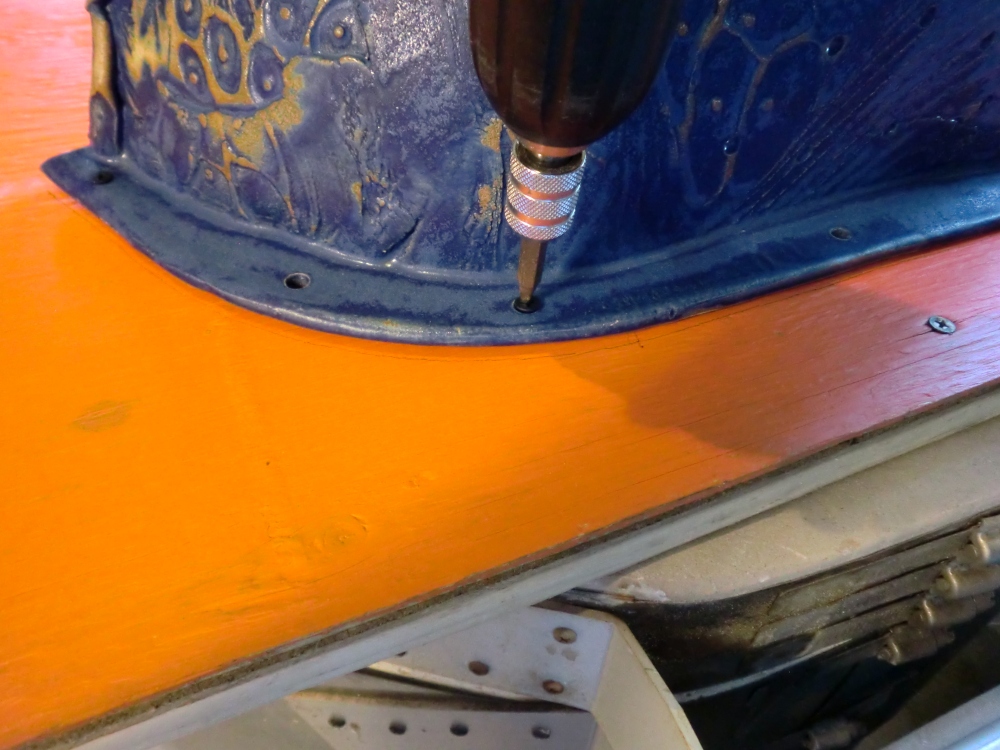
After drying for a day or so I made holes in the flange so I could attach the pot to the wood with a few screws.
#11 Have patience.
With the pots completed, they were set aside under plastic to dry. After bisque firing they were glazed and fired again.
#12 Ask for help.
Once in a while I need some help. The wooden sign needed to be framed on the back and have hooks inserted in the top. My partner is usually up for helping out when he can.
#13 Attention to detail.
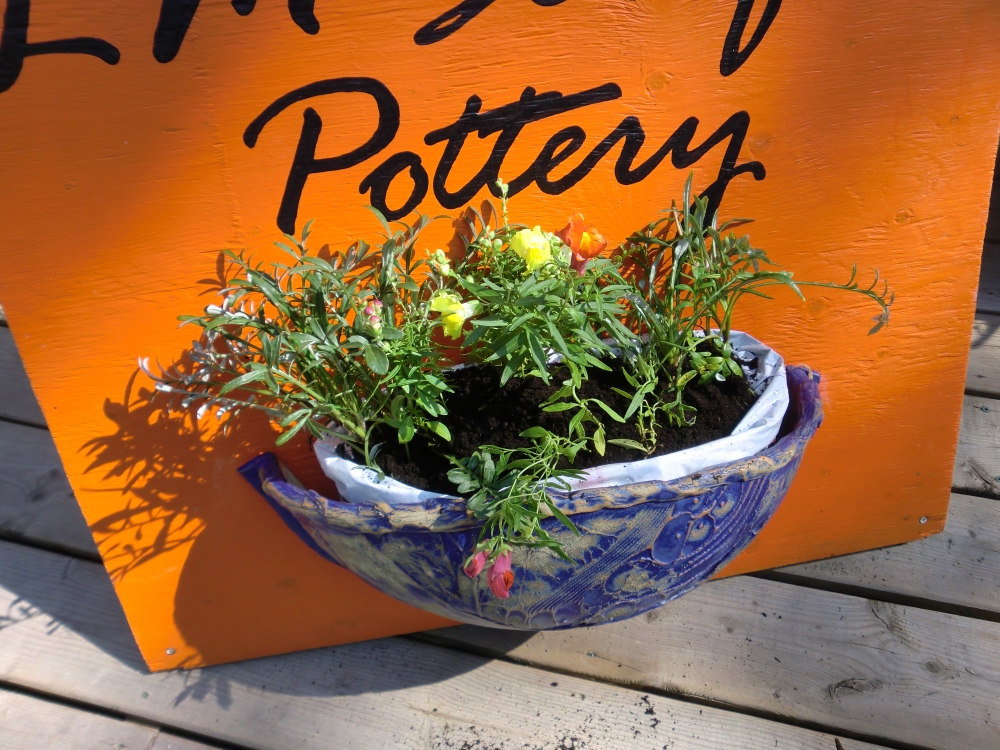
It was always my intention to put flowers in the planter, but I was concerned that the wet earth against the wood would rot the wood, so while falling asleep one night I had an idea. Line the planter with plastic! So I re-purposed a soil bag.
And added flowers.
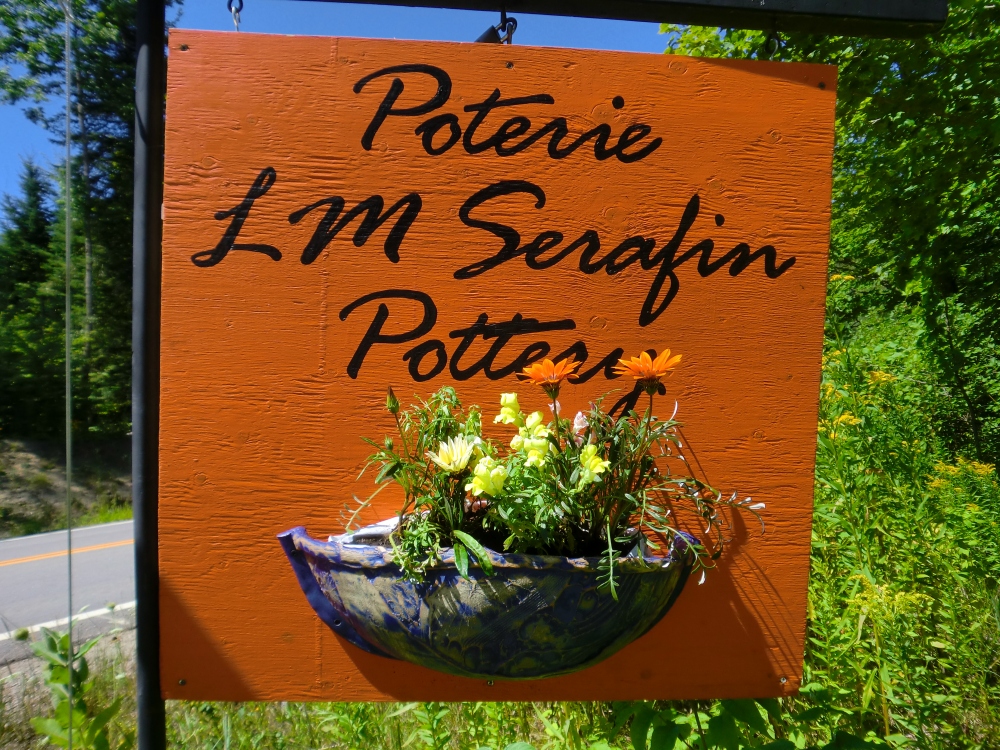
Then hung it at the top of the road on my sign post.
Now that I’ve got one sign completed it’s time to do the 2nd one!
I hope you enjoyed my How-to blog. Remember, when you visit, just turn right at the big orange sign with the flower pot on it. You CAN’T miss it!!




Wonderful clay sign. Thank you for sharing the creative process. Inspiring.
Thanks Nathalie. It was a long process, but in the end well worth it.